How to Set Up Auto-Forwarding from Gmail to Revdoku's Email
Table of Contents
- 1. Open Gmail’s settings
- 2. Find the forwarding settings
- 3. Add a forwarding address
- 4. Enter your bucket’s email address
- 5. Confirm the destination
- 6. Dismiss the confirmation notice
- 7. Open the confirmation email in Revdoku
- 8. Confirm forwarding with Google
- 9. Return to Gmail
- 10. Create a recipient filter
- 11. Choose the forwarding action
- 12. Check the filter and test delivery
- Forward every new email instead
- Troubleshooting
- 1. Open Gmail’s settings
- 2. Find the forwarding settings
- 3. Add a forwarding address
- 4. Enter your bucket’s email address
- 5. Confirm the destination
- 6. Dismiss the confirmation notice
- 7. Open the confirmation email in Revdoku
- 8. Confirm forwarding with Google
- 9. Return to Gmail
- 10. Create a recipient filter
- 11. Choose the forwarding action
- 12. Check the filter and test delivery
- Forward every new email instead
- Troubleshooting
Forward incoming Gmail messages to a Revdoku cloud bucket so AI agents can read stored email content in JSON/Markdown and access attachments. The screenshots below show how to forward messages matching a To-recipient filter. To forward every new non-spam message, use the alternative after step 12.
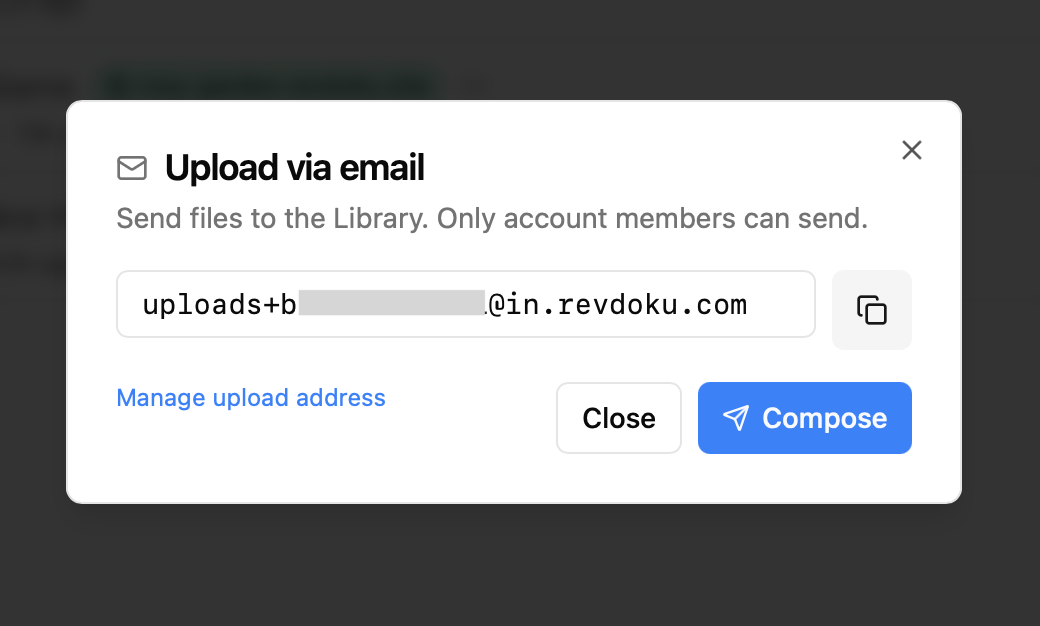
Before starting, use a computer and browser to create or open a bucket at Revdoku. Copy its actual email address ending in @revdokumail.com; this tutorial uses <unique.id>@revdokumail.com as a placeholder.
Google Workspace accounts with custom domains use the same Gmail settings. The screenshots show this type of account.
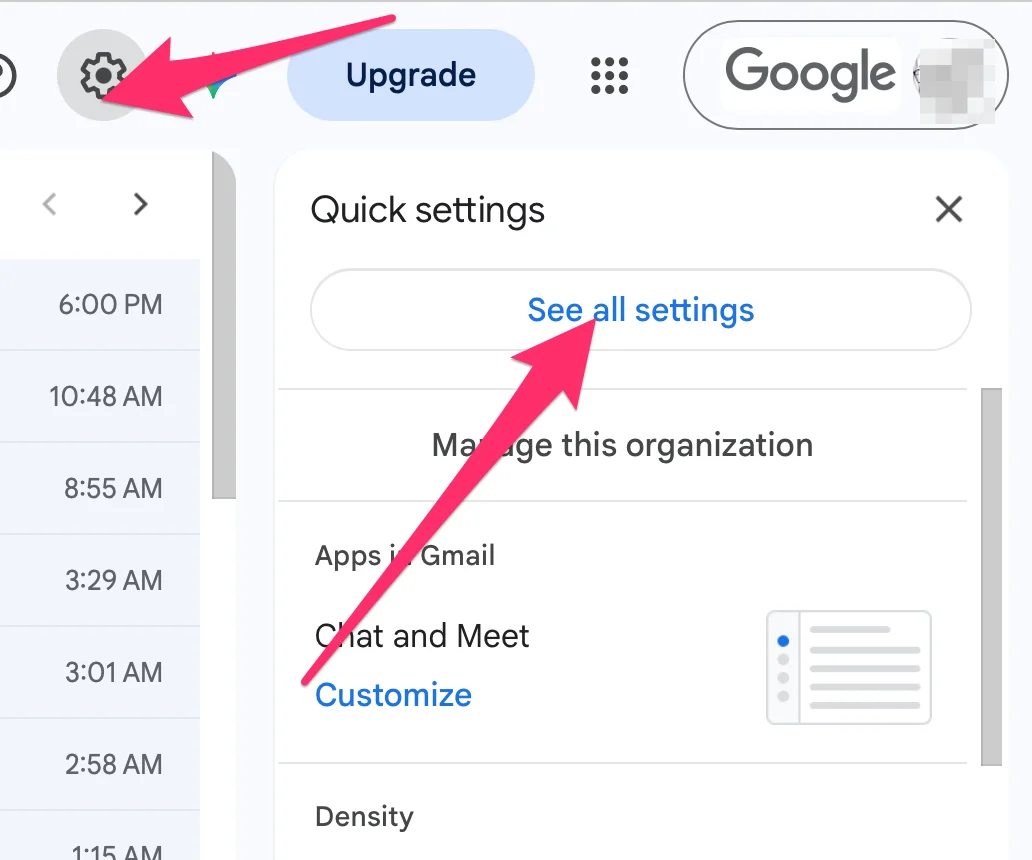
1. Open Gmail’s settings
In Gmail, click the Settings gear in the upper-right corner, then click See all settings to open the full settings page.
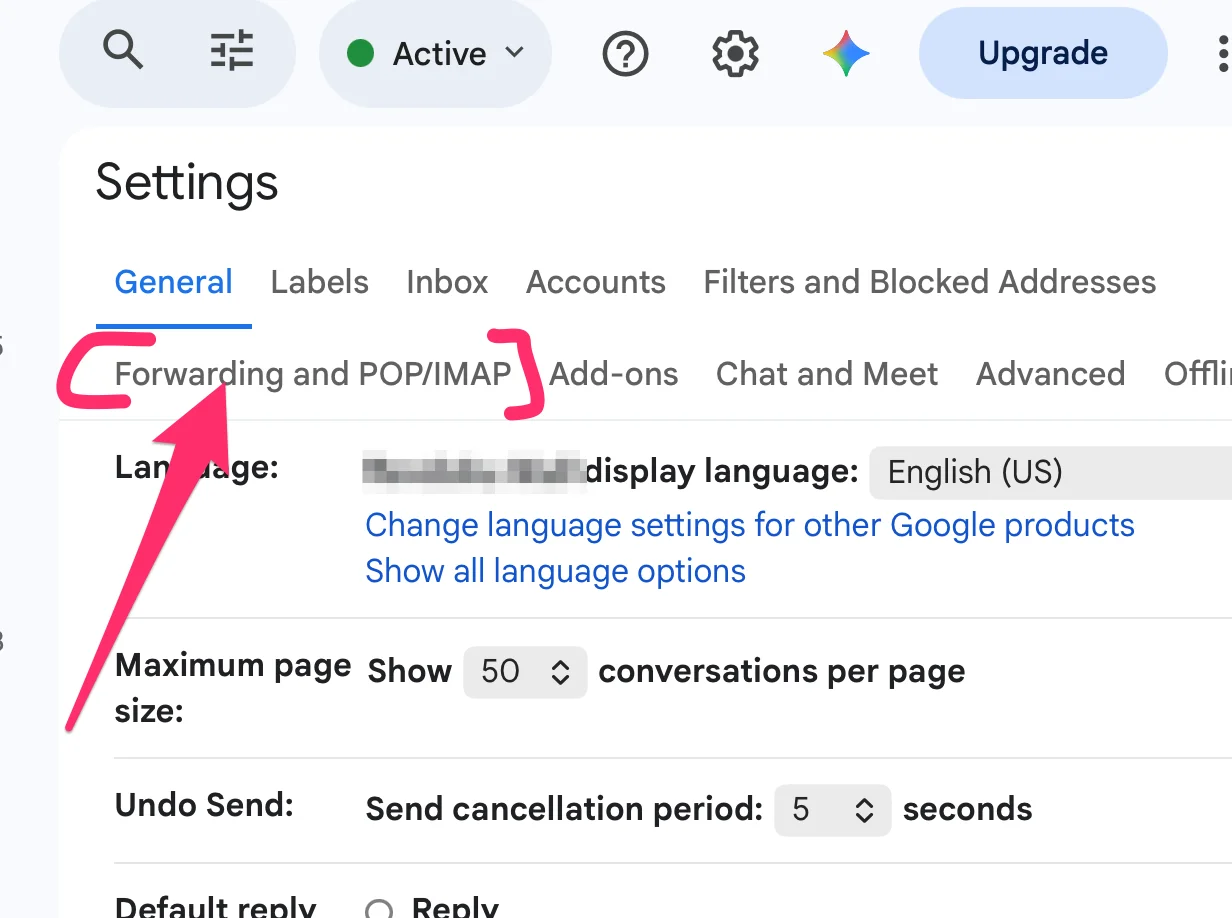
2. Find the forwarding settings
Open the Forwarding and POP/IMAP tab. Depending on your account, the tab may simply be called Forwarding.
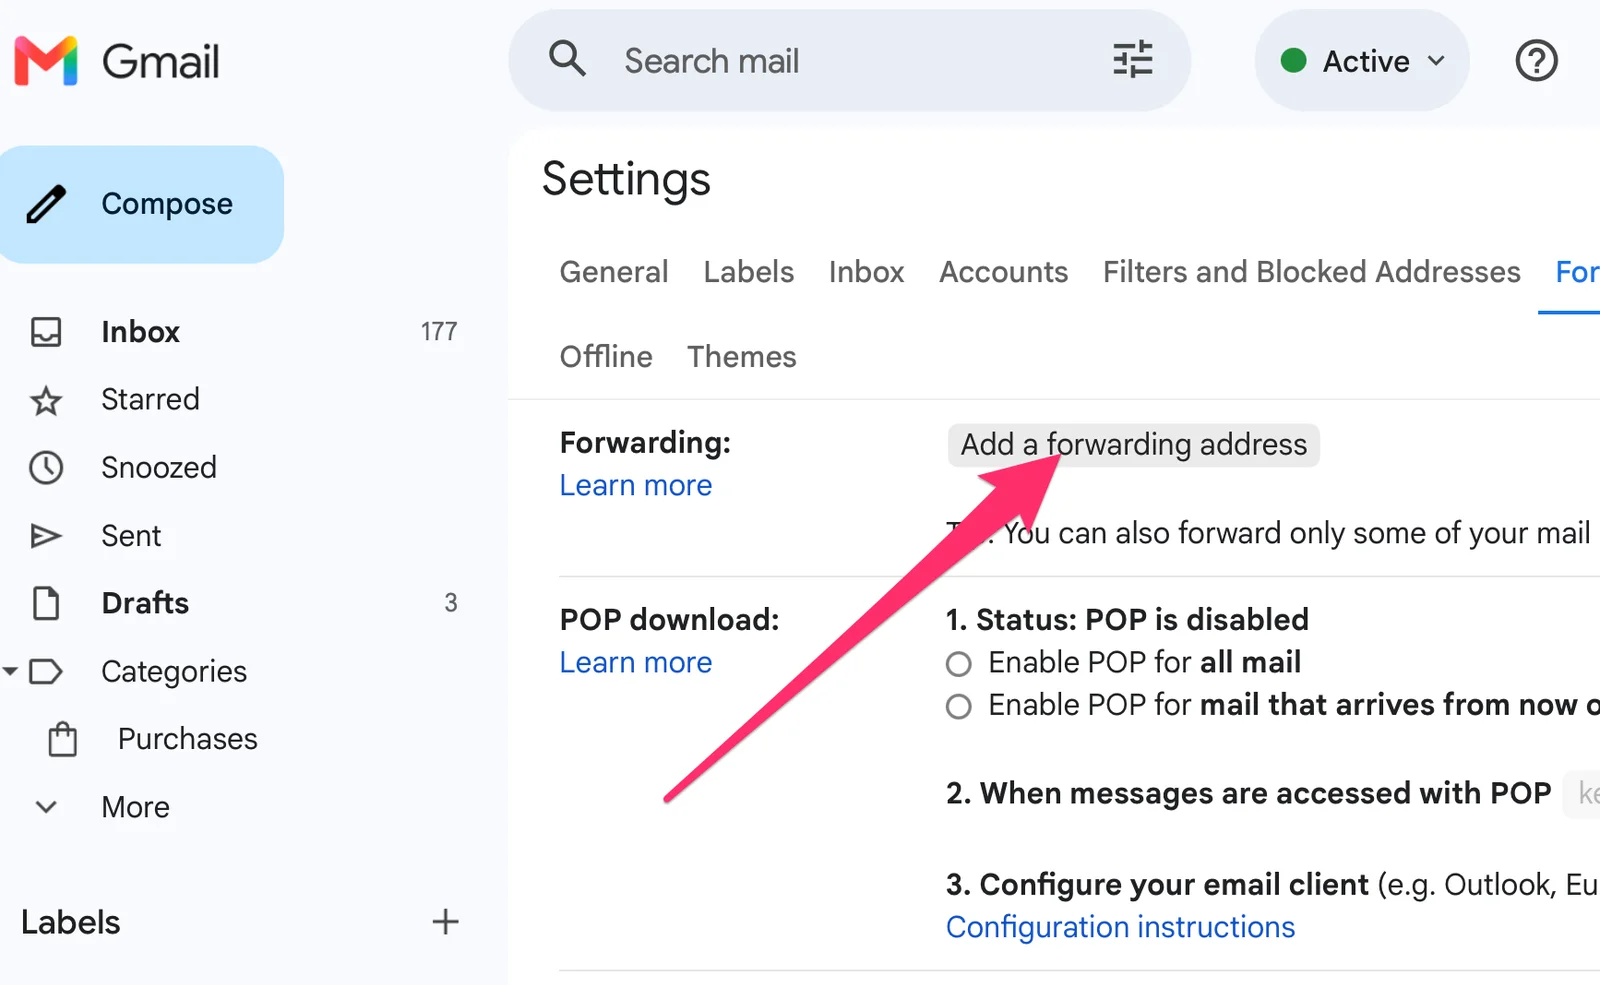
3. Add a forwarding address
In the Forwarding section, click Add a forwarding address. This begins the process of registering your bucket as a destination.
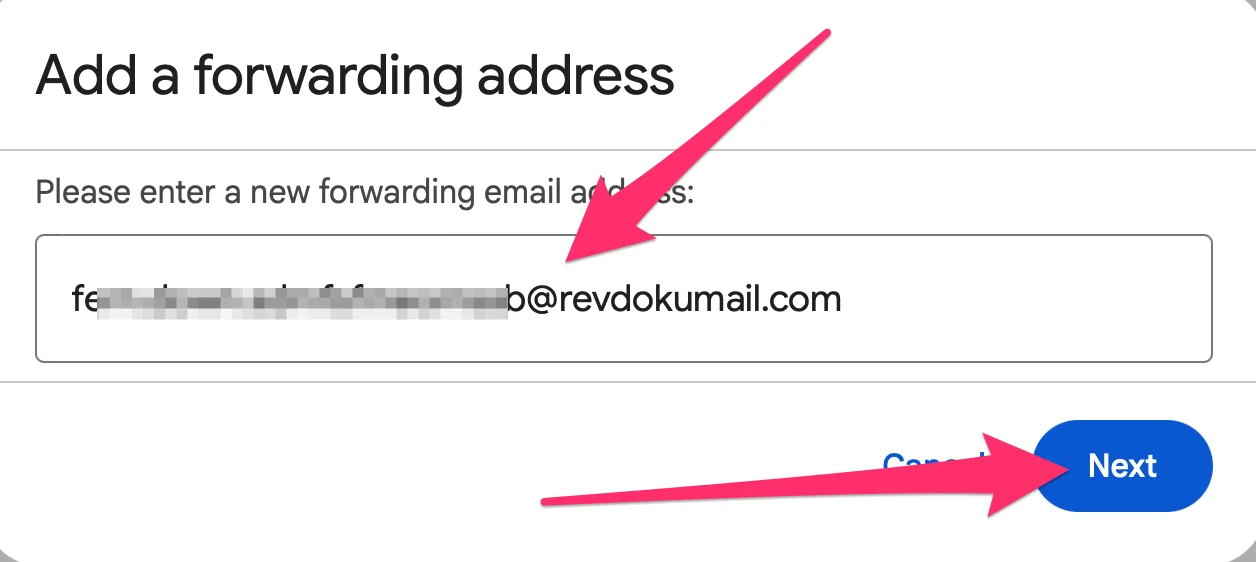
4. Enter your bucket’s email address
Paste the address you copied from Revdoku, represented here as <unique.id>@revdokumail.com. Check that you copied the complete address, then click Next.
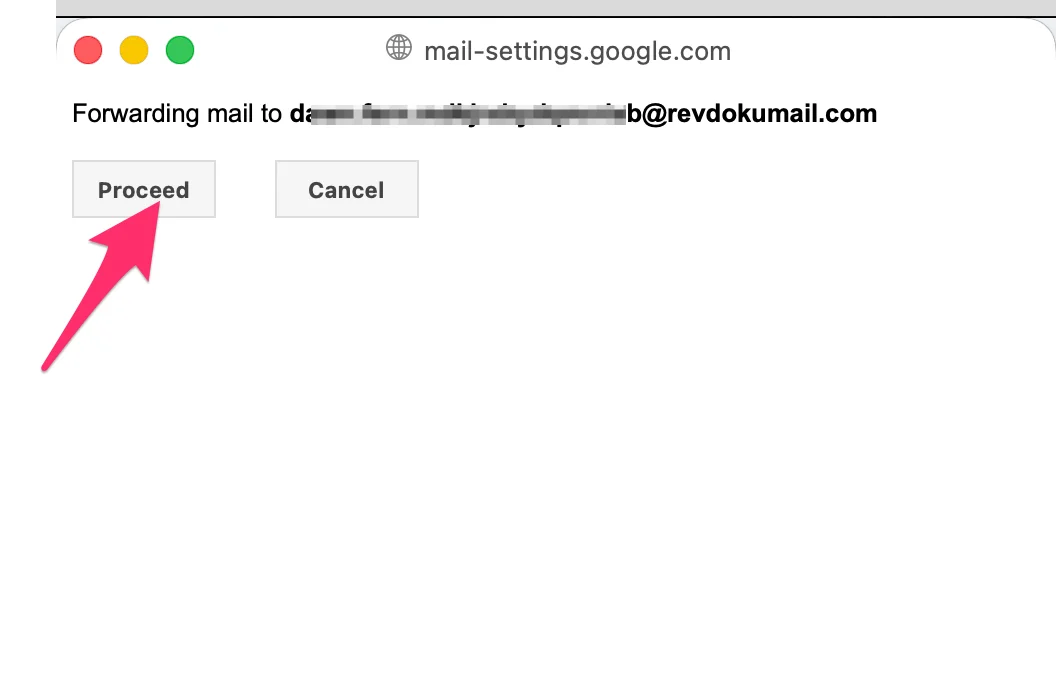
5. Confirm the destination
Google opens a confirmation window. Check that the destination matches your intended Revdoku bucket’s email address, then click Proceed.
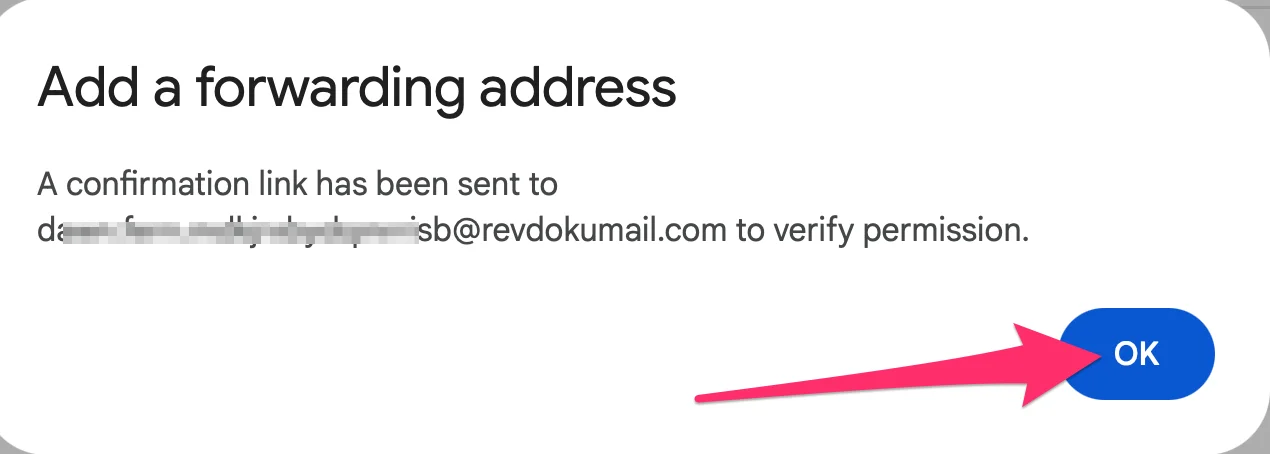
6. Dismiss the confirmation notice
Gmail confirms that it has sent a confirmation link to the destination address. Click OK.
The address is not yet verified. You still need to open the email in Revdoku and confirm the request.
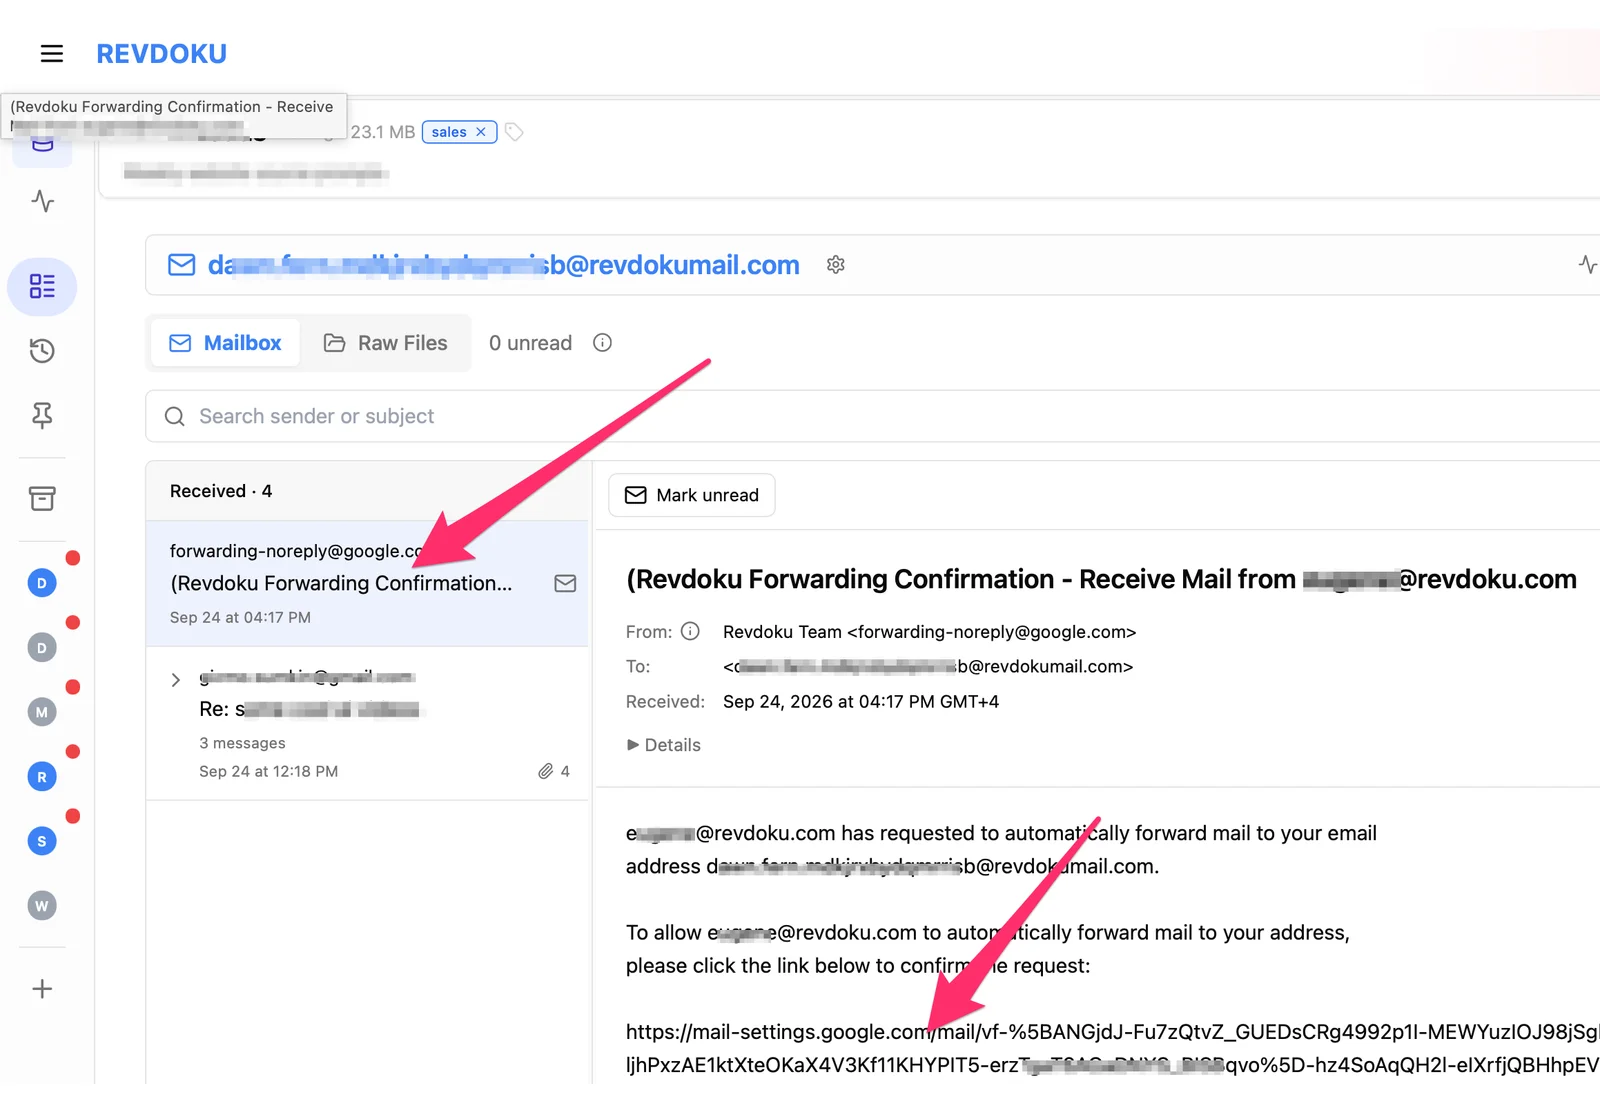
7. Open the confirmation email in Revdoku
Open your bucket’s Mailbox in Revdoku. Find the confirmation email from [email protected], open it, and follow the confirmation link inside that email.
Use the link from your own confirmation message.
8. Confirm forwarding with Google
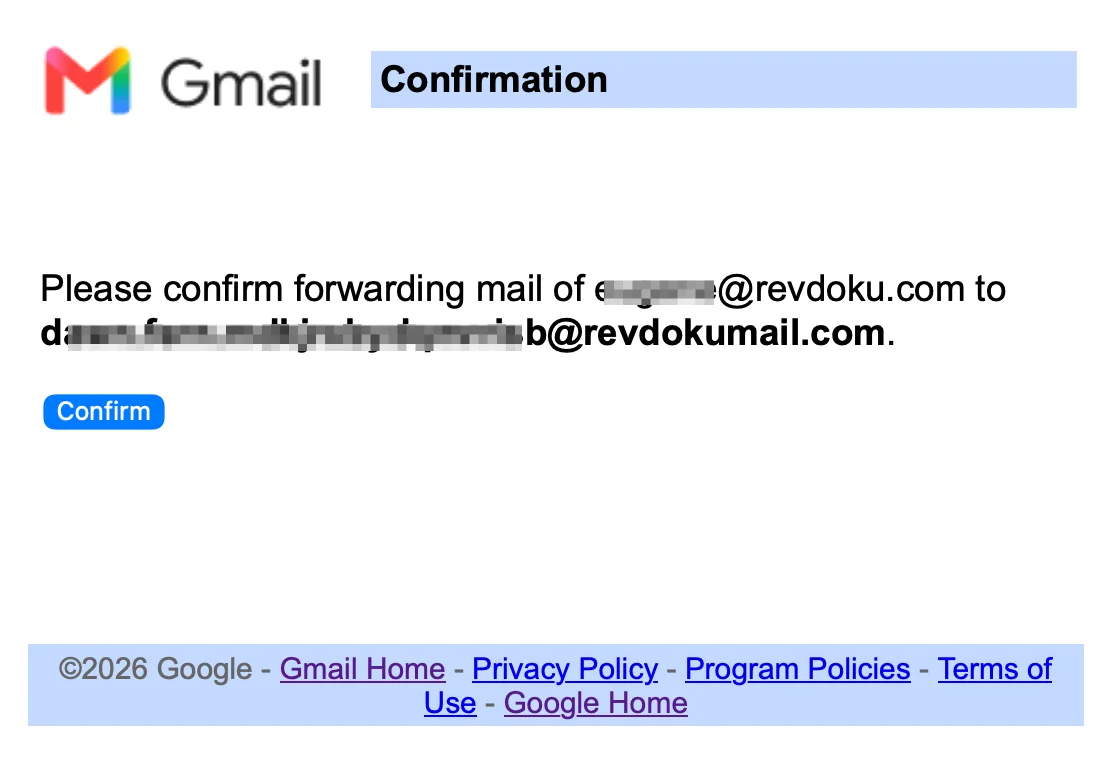
On Google’s confirmation page, check both addresses: the source should be your Gmail or Google Workspace account, and the destination should be your Revdoku bucket.
Click Confirm.
9. Return to Gmail
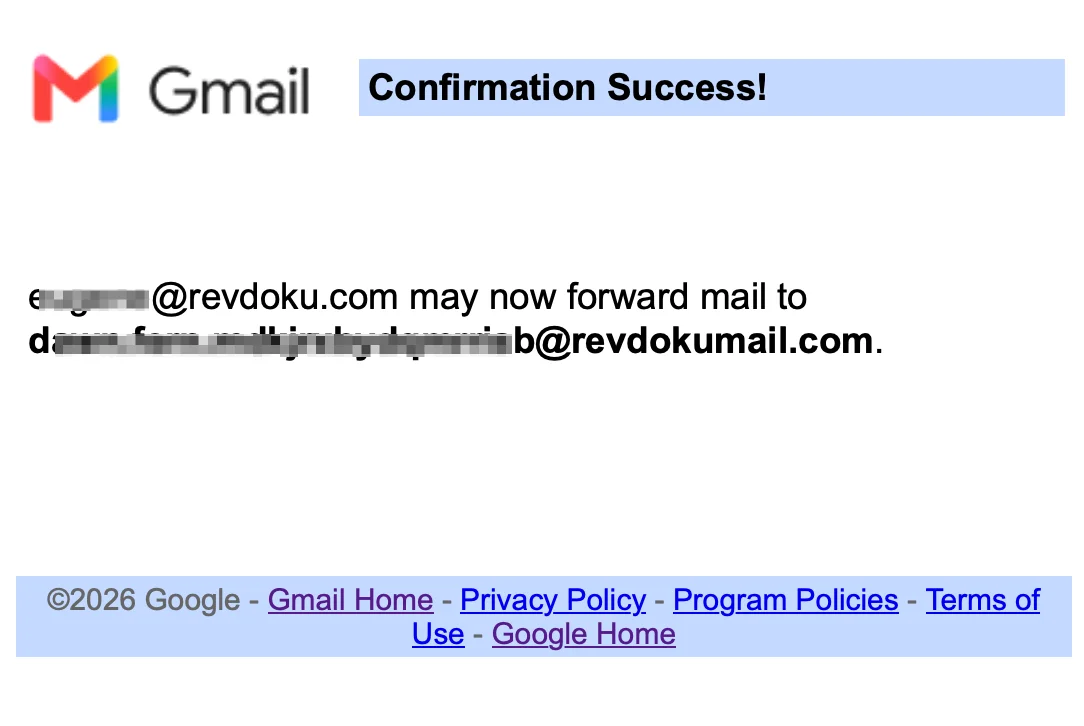
Confirmation Success means your destination address is verified. It does not mean the forwarding filter has been created.
Return to Gmail and refresh the settings page if necessary.
10. Create a recipient filter
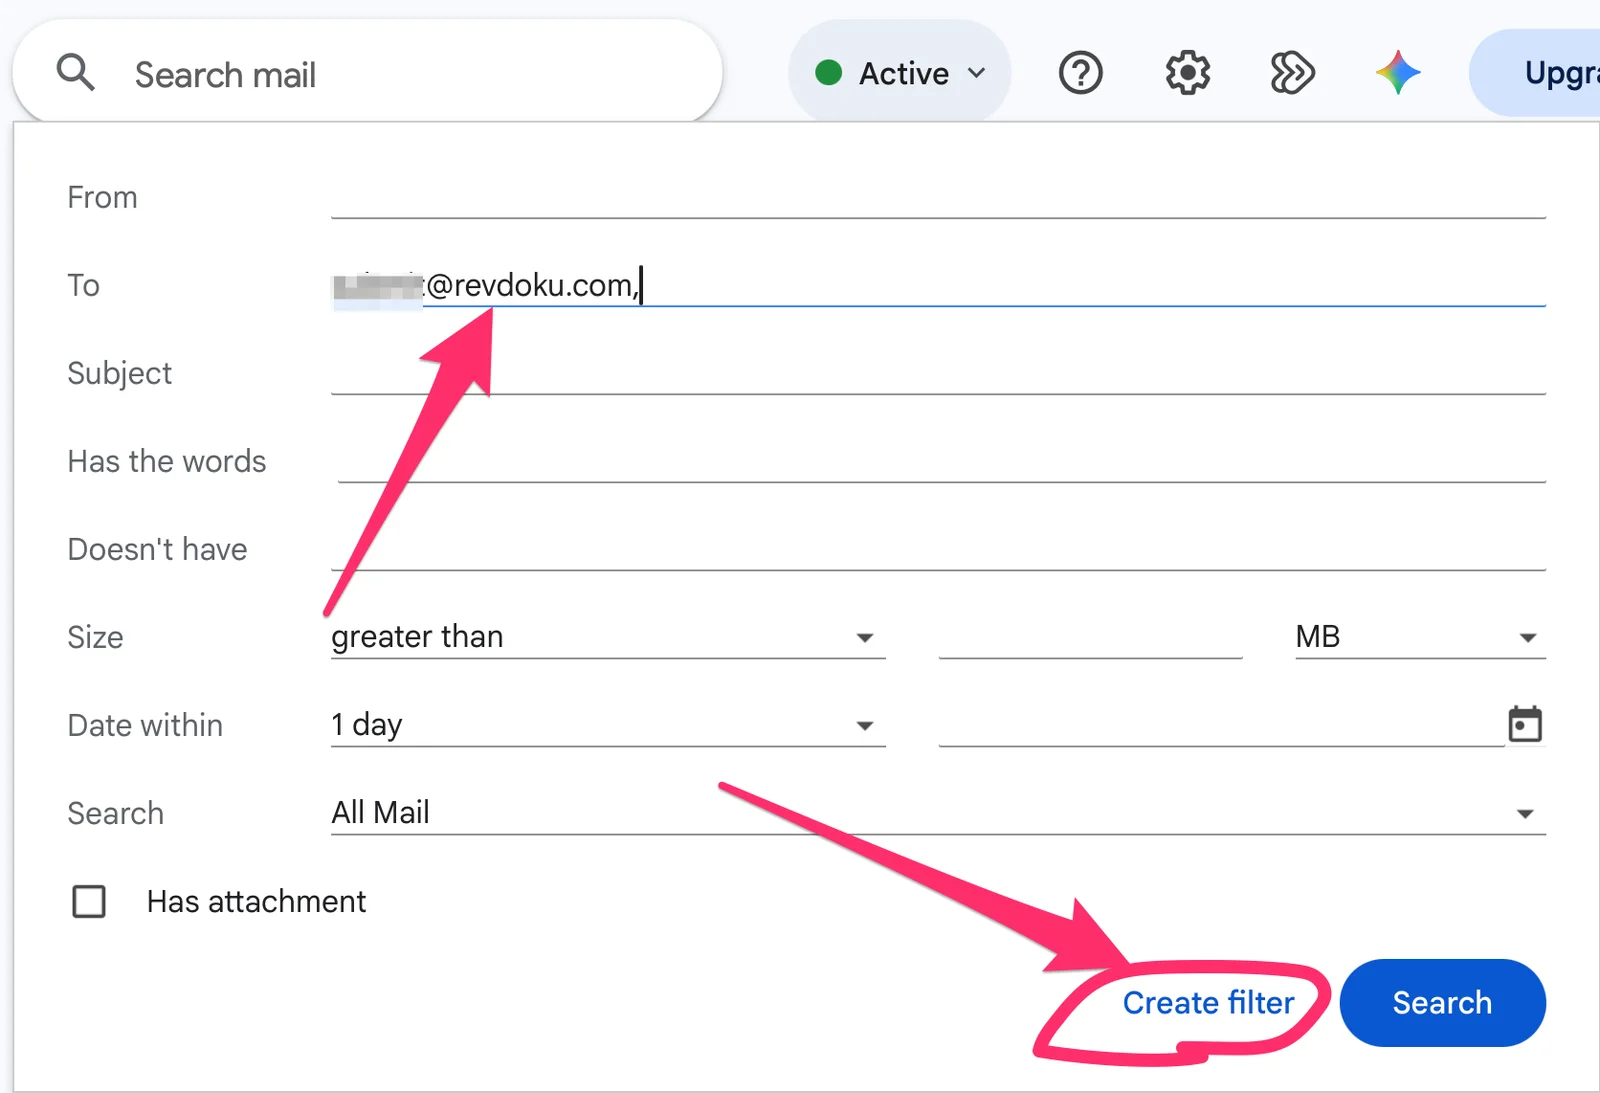
Open Show search options in Gmail’s search bar. In To, enter the source Gmail or Google Workspace address that receives your messages—not the Revdoku destination. Leave the other criteria blank, then click Create filter.
The screenshot uses a custom-domain source address. This recipient filter forwards only new messages matching the specified To address. It does not guarantee coverage of aliases, Bcc messages, mailing lists, or every message delivered to your mailbox.
Replies must also match the criteria to be forwarded, as explained in Google’s filter documentation.
11. Choose the forwarding action
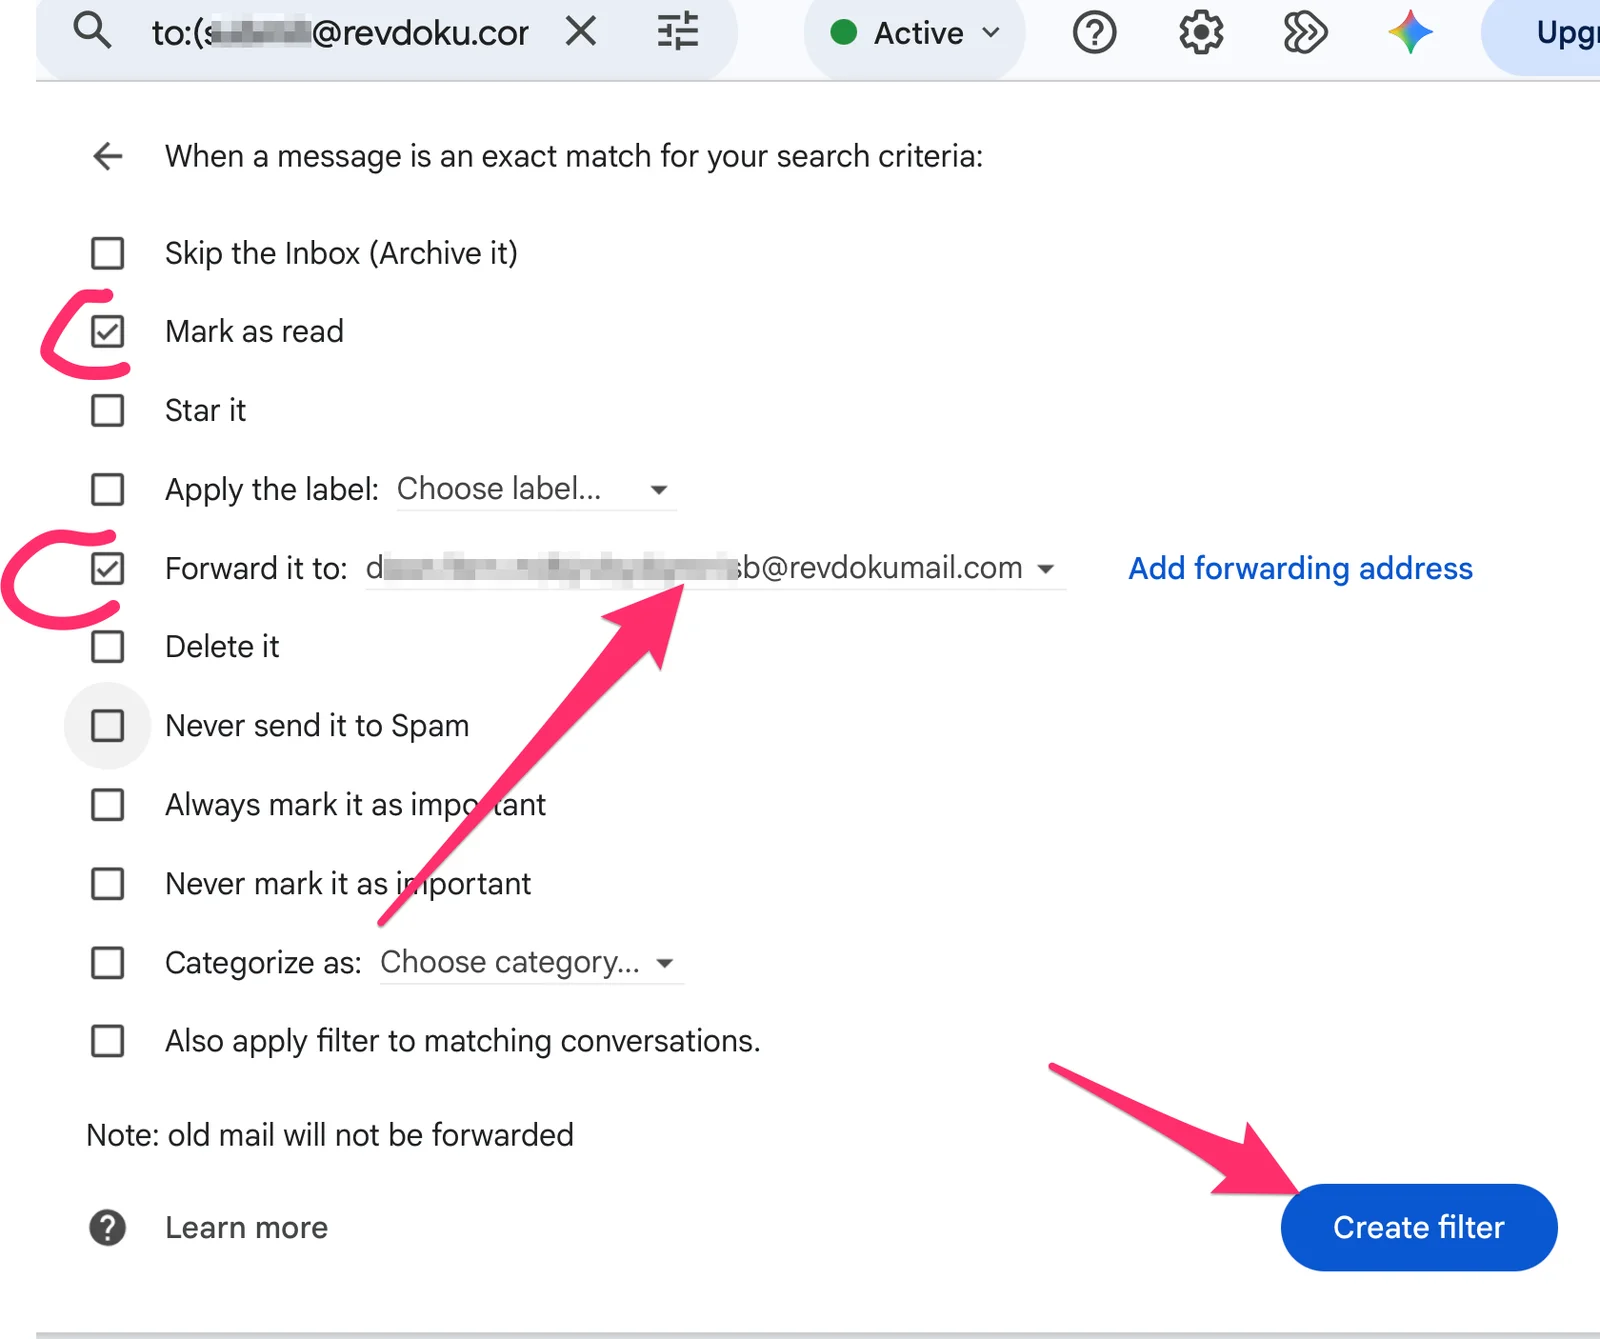
Select Forward it to and choose your verified bucket address ending in @revdokumail.com. Click Create filter to save it.
Mark as read is selected in the screenshot, but it is optional. Leave it unchecked to preserve unread status in Gmail. Leave delete, archive, and never-spam options unchanged unless you specifically want those actions.
Existing messages will not be forwarded, even if you apply other filter actions to existing conversations. Forwarding applies only to new matching messages.
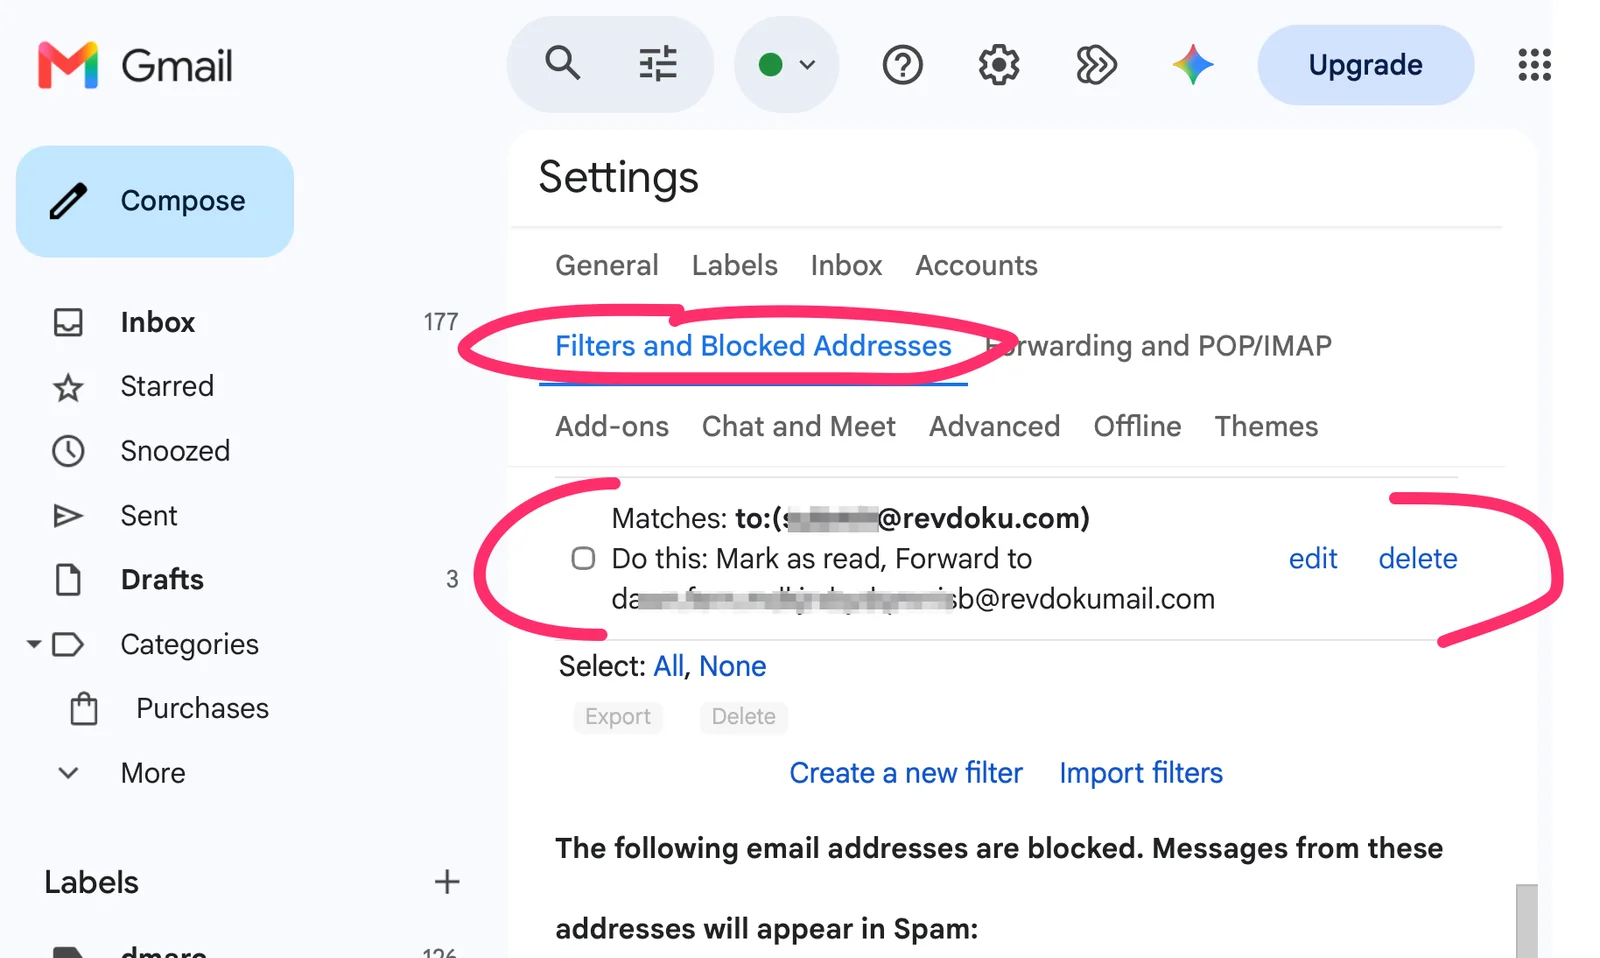
12. Check the filter and test delivery
Open Settings > Filters and Blocked Addresses. Confirm that the filter shows the intended To condition and Forward to action. Check the exact destination address.
Send a fresh test message from a different email account to the source address. Include an attachment if you want to check attachment handling. Then inspect the Revdoku bucket’s Mailbox and Raw Files for the email, JSON/Markdown files, and any attachments.
Forward every new email instead
For all incoming non-spam mail, use Gmail’s built-in global forwarding. It covers new messages even when they do not match the illustrated To filter.
Once your bucket address is verified:
- Open Settings > Forwarding and POP/IMAP.
- Select Forward a copy of incoming mail to and choose the bucket address.
- Select keep Gmail’s copy in Inbox.
- Click Save Changes.
See Google’s automatic forwarding instructions for details.
Use one forwarding method for this destination. If switching to global forwarding, remove the example filter under Filters and Blocked Addresses.
Troubleshooting
- Confirmation email missing: Check the bucket and destination address, then refresh the Revdoku Mailbox.
- Destination unavailable in Gmail: Complete verification, then refresh Gmail.
- No forwarded email: Send a new message matching the filter; existing mail is not forwarded. Work or school administrators can restrict forwarding.
Once delivery works, connect your AI agents to Revdoku to use the stored email content and attachments.
Get Email address for your AI agent
- Create a cloud bucket and copy its
<unique.id>@revdokumail.comemail address. - Emails sent to this email are saved as JSON and Markdown, attachments are extracted.
- Connect AI agents to read and manage saved emails and files via the API, CLI, MCP, or Skill.