How to Check a Used MacBook Before Buying
Table of Contents
- Before you meet the seller
- 1. Verify the serial number, model, and coverage
- Understand Apple warranty and AppleCare coverage
- 2. Inspect the screen
- 3. Inspect the body, keyboard, charger, and ports
- Check the keyboard carefully
- Check the charger and cable
- 4. Check battery health and cycle count
- 5. Check for company enrollment and MDM
- 6. Run Apple Diagnostics
- On a Mac with Apple silicon
- On an Intel-based Mac
- 7. Remove Activation Lock and finish at Setup Assistant
- Final decision list
- Before you meet the seller
- 1. Verify the serial number, model, and coverage
- Understand Apple warranty and AppleCare coverage
- 2. Inspect the screen
- 3. Inspect the body, keyboard, charger, and ports
- Check the keyboard carefully
- Check the charger and cable
- 4. Check battery health and cycle count
- 5. Check for company enrollment and MDM
- 6. Run Apple Diagnostics
- On a Mac with Apple silicon
- On an Intel-based Mac
- 7. Remove Activation Lock and finish at Setup Assistant
- Final decision list
Buying a used MacBook is safest when you test it in person and do not pay until the final erase-and-setup check is complete. Ask the seller to keep their password and Apple Account available during the inspection.
This checklist takes about 30 minutes, plus any time needed for hardware diagnostics. Bring Wi-Fi access, wired earphones if the model has a headphone jack, and a USB-C or MagSafe charger that is known to work.
Before you meet the seller
If you are paying cash, meet in a busy, well-lit public place where you can sit down and inspect the Mac without being rushed. A bank lobby, busy café, or coworking lobby with power and Wi-Fi is safer than a street corner or parked car.
Tell someone where you are meeting. Keep the cash out of sight while you test the Mac, and count or hand it over only after every check passes. If the seller refuses a proper inspection or tries to rush the payment, leave.
1. Verify the serial number, model, and coverage
Ask the seller to open Apple menu > System Settings > General > About. Check the model, chip or processor, memory, storage, and serial number against the listing.
Enter the serial number at Apple’s official Check Coverage page. The model shown by Apple should match the Mac in front of you. Coverage may be expired on an older Mac, which is normal.
Also compare the serial number in About with the number on the bottom case, if it is readable. A mismatch can mean the case or logic board was replaced, so ask for an explanation and repair records.
Understand Apple warranty and AppleCare coverage
A new Mac includes Apple’s one-year limited warranty against manufacturing problems. A used Mac receives only the time still remaining, if any. Accidents, drops, cracked screens, and damage caused by liquid are not covered by that warranty.
The names are easy to confuse:
- Apple one-year limited warranty: Included with a new Mac. Covers manufacturing issues for one year, but not accidental or liquid damage.
- AppleCare Protection Plan or older extended AppleCare: Extends eligible hardware service and technical support. It does not add accidental-damage coverage.
- AppleCare+: Paid coverage that includes qualifying accidental damage such as drops, cracked screens, and spills, subject to a fixed service fee, taxes, and plan exclusions. This is the most useful plan when accidental damage is your concern.
Verify the exact plan and expiration date on Apple’s coverage page. Ask the seller for the original receipt and any transfer paperwork the plan requires.
Without AppleCare+, MacBook repairs can be expensive. On many models, a keyboard repair requires replacing a larger top-case assembly rather than one key. Depending on the model and repair provider, an out-of-warranty quote can reach roughly US$500 to $800. Use Apple’s Mac laptop repair estimator or obtain a model-specific quote before negotiating.
Important: A valid serial number or active warranty does not prove ownership and does not prove that Activation Lock or company management has been removed. Continue through every step below.
2. Inspect the screen
First inspect the display while the Mac is turned off. Look across it from several angles under good light.
Check for:
- cracks, deep scratches, chips, and worn anti-reflective coating
- pressure marks or bright spots
- gaps between the display and its frame
- a loose hinge, bent lid, or screen that will not stay in position
Now test the display while it is on:
- Turn on the Mac and raise the screen brightness.
- View white, black, red, green, and blue backgrounds in full screen.
- Look closely for dead pixels, discoloration, flicker, horizontal lines, image retention, bright spots, and dark areas.
- Move the lid slowly through its normal range and make sure the image does not cut out or change color.
- Lower and raise the brightness to confirm that the controls and backlight respond normally.
For a more thorough check, play this 4K dead-pixel test on YouTube at the highest available quality and make it full screen. Pause on each solid color, inspect the entire display from close range, and look for pixels that stay black, white, or a different color. Replay a suspicious section before deciding that a mark is a bad pixel, because dust, reflections, and video compression can look similar.
3. Inspect the body, keyboard, charger, and ports
Check every corner and edge. Dents near a corner, a bent bottom cover, uneven gaps, or a lid that does not close squarely can indicate a hard drop. Minor surface scratches are cosmetic; cracks, deformation, loose parts, or signs of liquid are not.
These can mean the MacBook suffered a serious drop. Internal damage may exist even if the Mac still starts. Do not buy it unless a qualified technician has inspected it and you understand the full repair cost.
Check the keyboard carefully
- Inspect every keycap. None should be cracked, chipped, missing, tilted, loose, or lifting away from the keyboard.
- Open TextEdit and press every letter, number, symbol, arrow, function, brightness, and volume key.
- Test Space, Return, Delete, Shift, Control, Option, Command, and Touch ID.
- Watch for keys that stick, feel different, type twice, or fail to register.
- Ask the seller directly whether any water, coffee, or other liquid has ever reached the keyboard, even in a small amount.
A key that fails, types twice, sticks, feels loose, or lifts can require replacement of the larger top-case assembly. Walk away unless you have a model-specific repair quote and the price reflects it.
Even a small amount of liquid can damage the keyboard or logic board later. Apple uses liquid-contact indicators in current Mac laptops. Damage caused by liquid is not covered by Apple's one-year limited warranty or the older AppleCare Protection Plan. AppleCare+ can cover qualifying accidental liquid damage, but only subject to its current terms, exclusions, and service fee.
Read Apple’s explanation of liquid damage and Mac coverage. If the seller reports a spill, the keys feel sticky, or you see corrosion or discoloration, get the Mac inspected before buying.
Check the charger and cable
- Inspect the power adapter for cracks, loose pieces, burn marks, discoloration, bent contacts, or signs of overheating.
- Inspect the complete charging cable for cuts, fraying, exposed wire, crushed areas, sharp kinks, damaged connectors, or a loose strain-relief section.
- If it uses MagSafe, make sure the connector is clean, the pins move freely, and it attaches securely.
- Connect the charger and confirm that macOS reports charging.
- Test every port that can accept charging.
- Confirm that the adapter has enough wattage for that MacBook model.
Do not keep using a cracked adapter or damaged cable. Include the price of a safe replacement in your negotiation.
Test the remaining parts you will depend on:
- connect a USB device or adapter to each data port
- test the headphone jack, if present
- check the camera and microphone
- play audio through both speakers
- test Wi-Fi and Bluetooth
- click, drag, and use gestures with the trackpad
If a port, key, speaker, charger, or hinge fails, assume it will need repair and price the Mac accordingly.
4. Check battery health and cycle count
Open Apple menu > System Settings > Battery. Find Battery Health, then click the information button if one is shown.
Check two values:
- Condition: Prefer Normal. Service Recommended means the battery holds less charge than when new or is not functioning normally.
- Maximum Capacity: This compares the battery’s current capacity with its capacity when it was new. A reading of 80% means roughly 20% of the original capacity has been lost, not 50%.
At 80% or lower, budget for battery service, especially if the condition says Service Recommended or the charge falls quickly. Apple says a normal Mac battery is designed to retain up to 80% of its original capacity at its maximum cycle count. See Apple’s guidance on Mac battery health.
The MacBook may still work, but treat the battery as likely to need service or replacement soon. A Service Recommended condition, rapid charge loss, or an unexpected shutdown makes this warning more serious. Include a model-specific battery-service quote in the price.
Now check the cycle count:
- Hold the Option (⌥) key and click the Apple menu .
- Choose System Information.
- Select Power in the left sidebar.
- Find Cycle Count under Health Information.
- Compare it with Apple’s cycle-count limits for Mac laptops.
Unplug the charger and use the Mac for at least 10 minutes at medium-to-high brightness. Watch for sudden percentage drops, unexpected shutdowns, or a battery that will not charge.
5. Check for company enrollment and MDM
A company- or school-managed Mac can receive restrictions or be required to enroll again after it is erased. Run this check with the seller present.
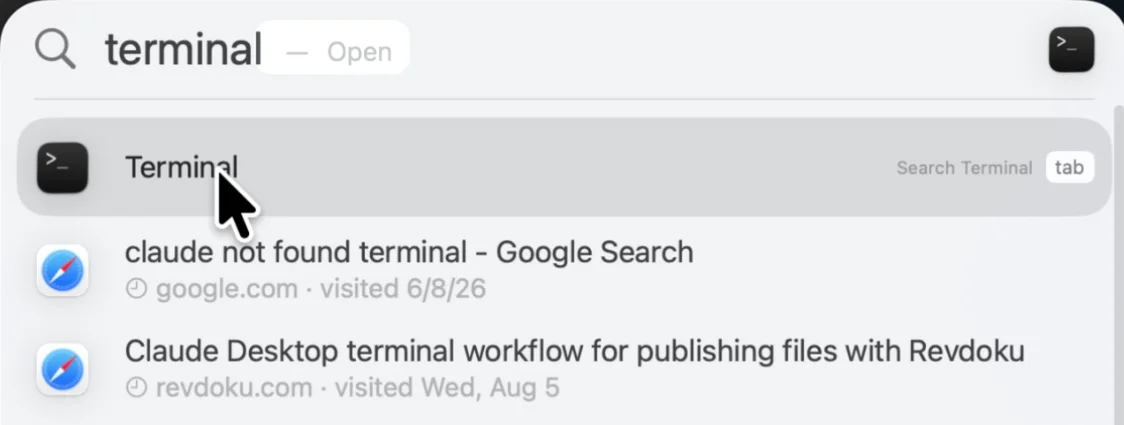
Press Command (⌘) + Space, type Terminal, then open Terminal.
Type this command exactly and press Return:
profiles status -type enrollmentFor an ordinary personal Mac, the result should be:
Enrolled via DEP: No
MDM enrollment: No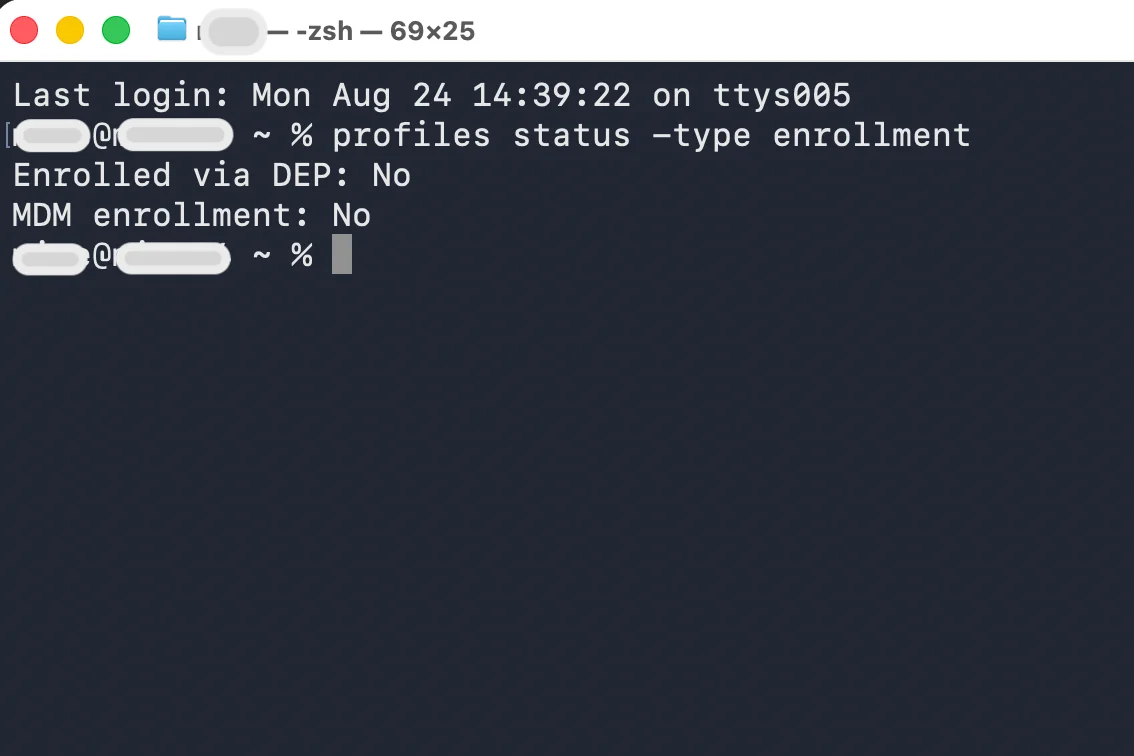
Also open System Settings > General and look for Device Management or Profiles. If that section exists, review it for organization-installed profiles.
If either Terminal result is Yes, or an organization profile cannot be removed, do not pay. The seller must have the organization legitimately remove the Mac from its management service and Apple Business Manager or Apple School Manager. Then the Mac must be erased and checked again. Do not rely on a promise that a repair shop can bypass management.
Apple explains that Automated Device Enrollment is intended for organization-owned devices and can require management again during setup.
6. Run Apple Diagnostics
Apple Diagnostics is a special set of hardware tests built into the Mac. It lets you check components such as the display, keyboard, trackpad, memory, sensors, and power hardware without first taking the Mac to an Apple Store or repair shop. It cannot guarantee that every intermittent problem is absent, but it is one of the strongest checks you can run before buying.
Connect the Mac to power. Disconnect accessories except the charger, keyboard, mouse, display, or Ethernet adapter. Put the Mac on a hard, flat surface with good ventilation, then shut it down.
Before shutting it down, check Apple menu > System Settings > General > About to see whether the Mac has an Apple chip or an Intel processor.
On a Mac with Apple silicon
- Press and keep holding the power or Touch ID button.
- Release it when startup options appear and you see Options.
- Hold Command (⌘) + D until the Mac restarts.
- Connect to Wi-Fi if asked, then follow the onscreen instructions.
On an Intel-based Mac
- Press the power button.
- Immediately hold the D key.
- Release it when a progress bar or language selector appears.
- If D does not work, restart and try Option (⌥) + D.
Follow every prompt. The exact tests depend on the Mac and macOS version. On macOS Tahoe 26 or later, Apple Diagnostics may let you choose tests for the display, keyboard, or trackpad. Interactive tests can ask you to press keys or can play loud sounds. Allow about 20 to 30 minutes for a careful session, although the automatic test may finish sooner.
Apple’s official instructions are in Use Apple Diagnostics to test your Mac.
At the end, review every result and any reference code. Hardware items should show a green check or a no-issue result.
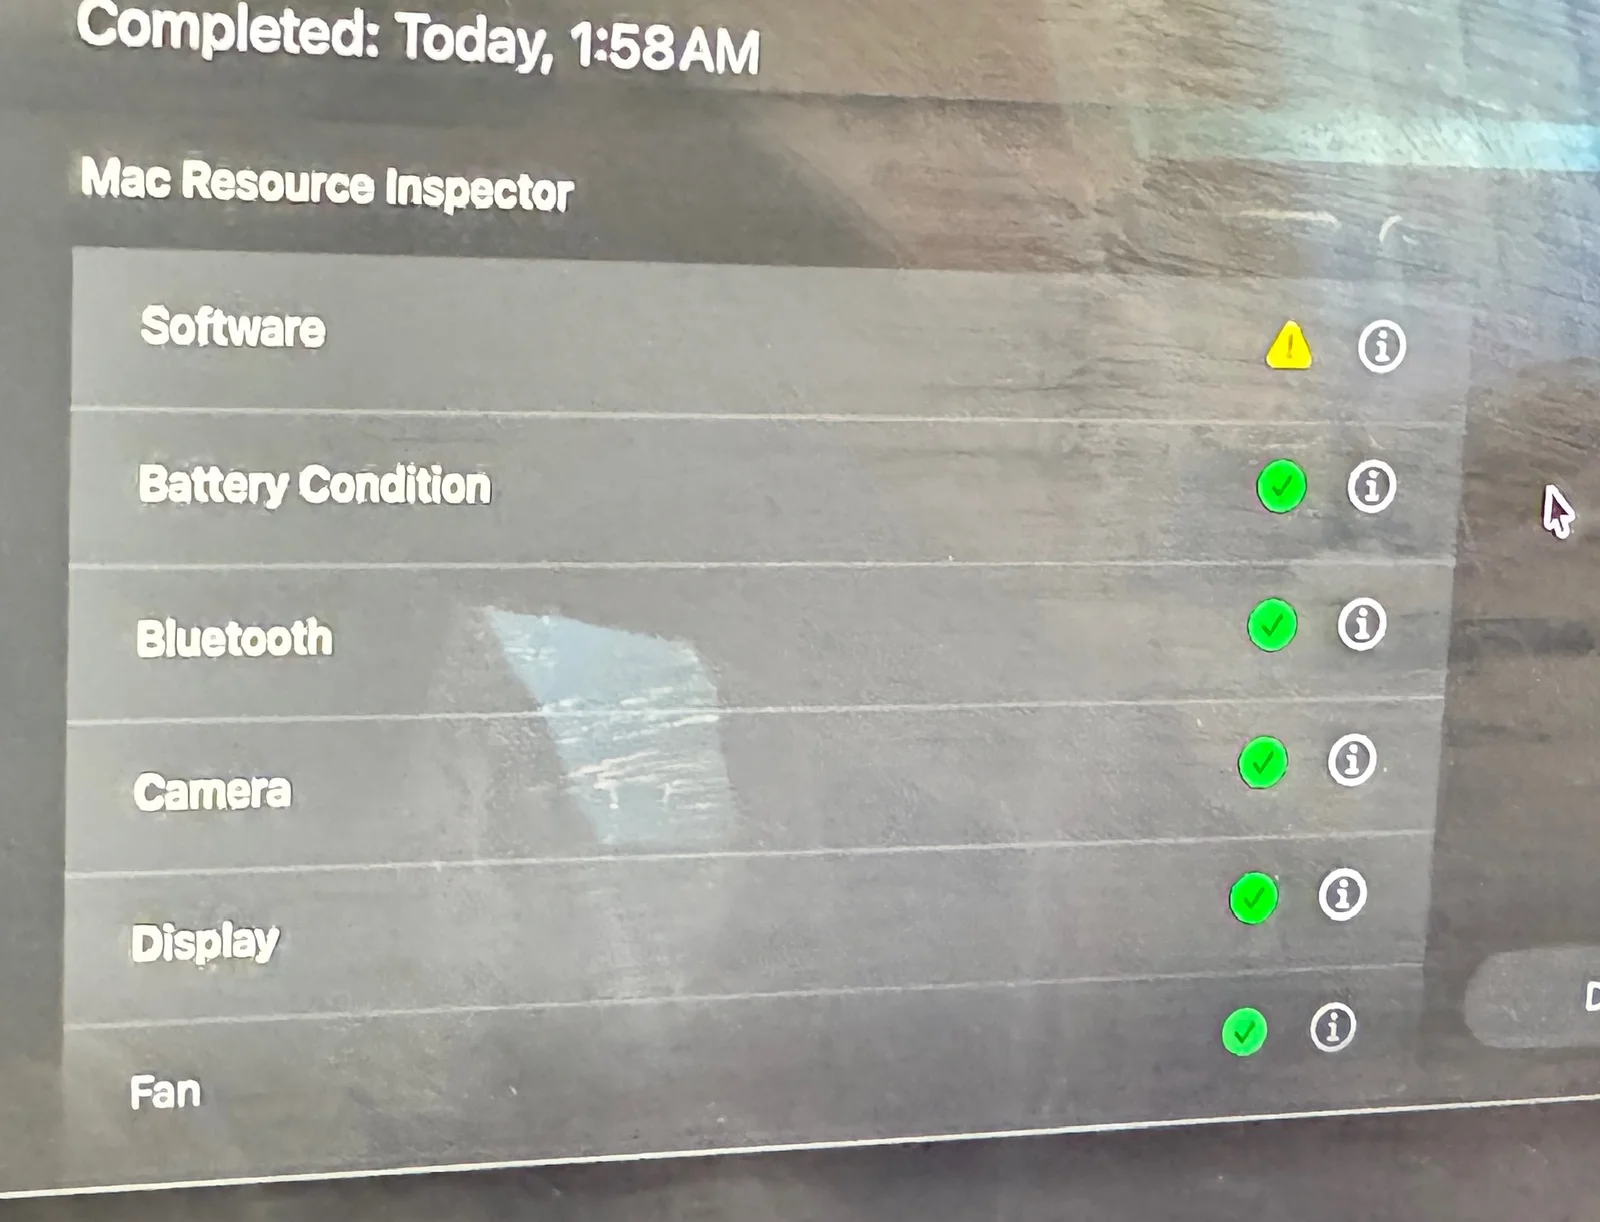
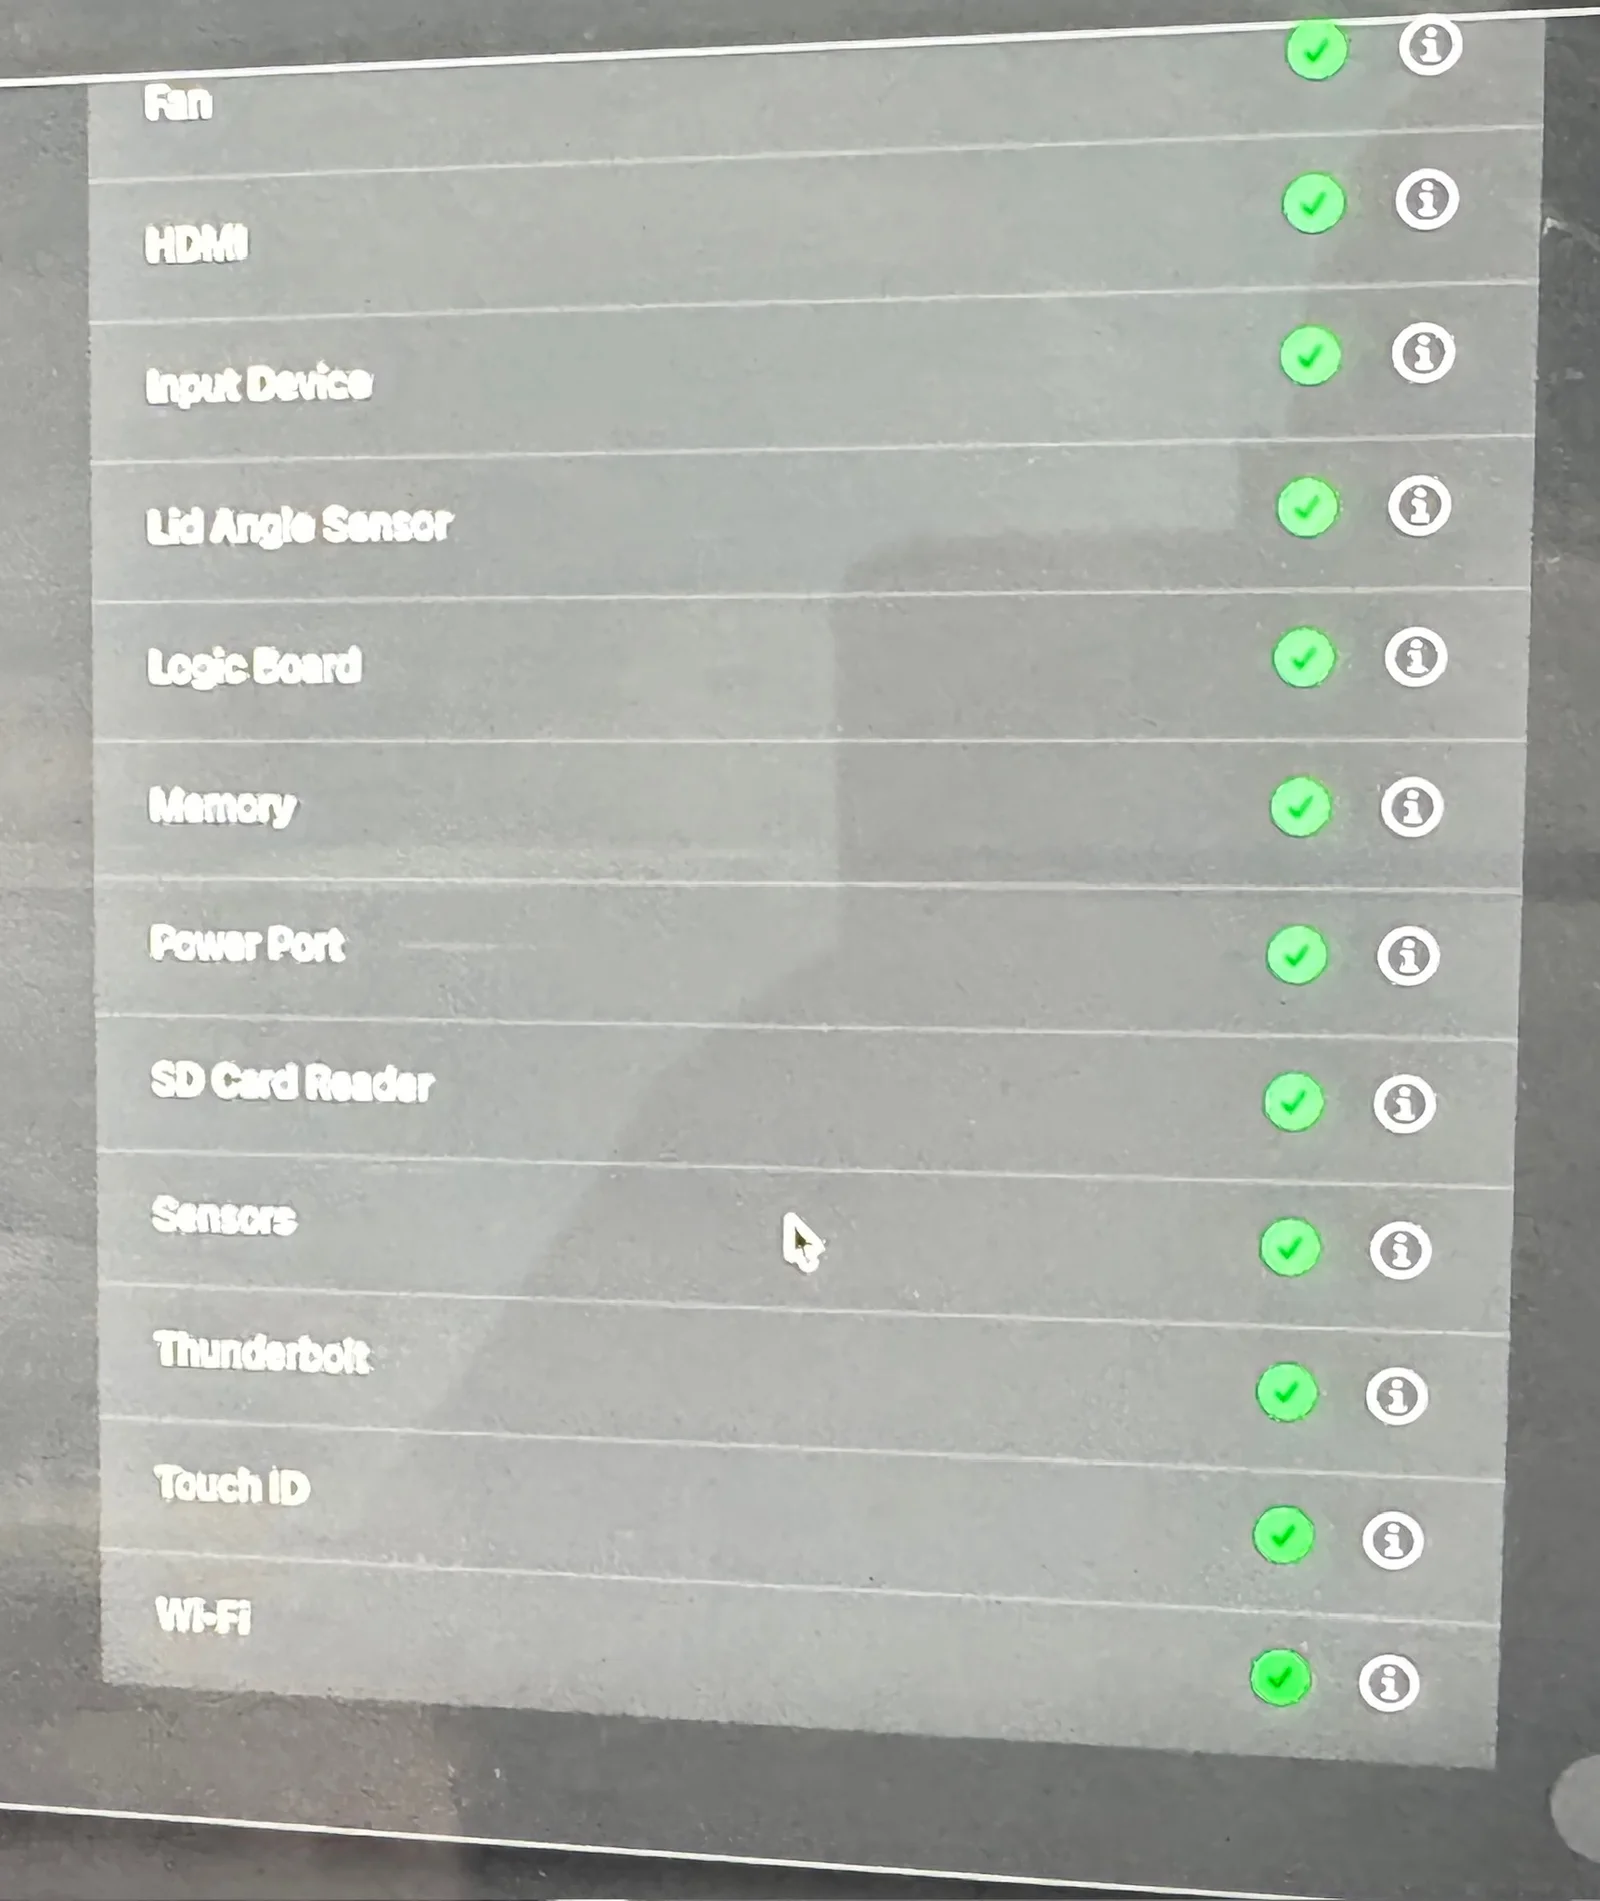
In the example above, the photographed hardware checks are green, but the Software row has a yellow warning. Click the information button and understand any warning before buying. If a hardware test fails or shows a reference code, get a repair estimate before agreeing on a price.
7. Remove Activation Lock and finish at Setup Assistant
Do this before payment, because seeing the seller’s desktop is not enough.
Ask the seller to turn off Find My:
- Open Apple menu > System Settings.
- Click the seller’s name.
- Open iCloud > See All > Find My Mac.
- Turn off Find My Mac. The seller must enter their Apple Account password.
Apple explains that turning off Find My disables Activation Lock.
Next, ask the seller to erase the Mac:
- Open System Settings > General > Transfer or Reset.
- Choose Erase All Content and Settings.
- Let the seller enter their administrator and Apple Account passwords.
- Wait for the Mac to restart and show Setup Assistant.
- Connect it to Wi-Fi and continue far enough to confirm that it does not request the previous owner’s Apple Account and does not show a mandatory Remote Management screen.
Apple’s factory-reset instructions explain that a supported Mac should activate and return to Setup Assistant after the erase.
This is commonly called an iCloud lock; on a Mac, Apple calls it Activation Lock. Do not pay until the seller removes it and the erased Mac passes setup again. Also stop if Setup Assistant shows Remote Management. A repair shop cannot legitimately bypass these protections. Apple may consider an Activation Lock support request when valid proof of purchase is available, but a buyer should not assume that exception will apply.
Final decision list
Use this as a final buy-or-walk-away review. Do not pay until every item is resolved:
- ❗️RED FLAG: DEP or MDM. Terminal must show Enrolled via DEP: No and MDM enrollment: No. There must be no organization profile or mandatory Remote Management screen.
- ❗️RED FLAG: iCloud or Activation Lock. After the seller erases the Mac, Setup Assistant must not ask for the previous owner’s Apple Account.
- ❗️RED FLAG: Liquid exposure. Do not ignore a reported spill, sticky keys, corrosion, or liquid marks. Even a small amount can cause delayed damage.
- ❗️RED FLAG: Keyboard failure. Every key must work normally. Do not ignore a key that fails, types twice, sticks, feels loose, or is lifting.
- ❗️RED FLAG: Battery at 80% or below. Budget for battery service or replacement, especially if macOS says Service Recommended or the charge falls quickly.
- ❗️RED FLAG: Cracks or case deformation. Cracks, a bent case, separated seams, or a lid that does not close squarely can indicate a serious drop.
- Apple’s coverage page recognizes the serial number, and the model matches the listing and the Mac in front of you.
- Warranty or AppleCare coverage has been verified on Apple’s website rather than assumed from the seller’s description.
- The screen has no unacceptable cracks, scratches, dead pixels, flicker, lines, pressure marks, or backlight problems.
- The trackpad, hinge, speakers, camera, microphone, Wi-Fi, Bluetooth, ports, charger, and charging cable work and show no dangerous damage.
- Apple Diagnostics shows no unresolved hardware issue or unexplained reference code.
- You completed the inspection in a safe public place or at a safe exchange zone at a local police station before handling payment, and the seller erased the Mac in front of you.
Ideally, also keep the seller’s receipt or write a bill of sale that includes the date, Mac model, serial number, price, and both parties’ names.
Give your AI agent
a free email address
Your AI agent or app gets a unique email address, like [email protected]. It can receive emails and attachments, send replies and store files.
History
- August 25, 2026 — Published by Revdoku Content Team
- August 26, 2026 — Reviewed by Eugene Mi
- September 5, 2026 — Last updated by Revdoku Content Team.
Related Articles

How to Password Protect a Netlify Site
Enable Netlify Password Protection, choose production or preview coverage, and test visitor access across deployment URLs and custom domains.

How to Password Protect a Vercel Deployment
Configure Vercel Password Protection, choose deployment environments, review bypasses, and test production and preview access.